Showing posts with label DIY:. Show all posts

Tuesday, June 25, 2024

Pachinko Restoration: Sankyo Update #1

Just a little Pachinko update...
I haven't had much time to devote to to the Pachinko machines, as I've been out of town. 
I've concentrated my attention on what I believe to be a 1974 Sankyo "Pinwheel" machine. It would appear from my research, that while my machine resembles the "Pinwheel" machine, it has some modifications (like the JET center target, and other unique targets). 

The play mechanism has also been tampered with, as I noticed the addition of a solenoid activated target.

So as you can see, I have removed the locking plates that hold the machine closed. I have also secured the Pachinko machine frame to the display frame. I was initially worried that removing the locking plates would cause the machine to open, but it's actually such a tight fit, that it requires some force to open, so no need for any securing mechanism. I have also started the process of converting the machine to 9 volts, as is evident by the 9V battery. 

The 9v battery poses a problem, in that it's not powerful enough to activate the solenoid. So I'm stuck on deciding whether to stay at 9 volts and remove the solenoid, find a solenoid that works on 9 volts, or move to a larger power supply.

That;s it for now, leave me a comment on what you think  I should do regarding the solenoid.

Friday, June 07, 2024

Pachinko Restoration: Intro

For those wondering, I'm doing very well post 4x bypass open heart surgery, the last few years have been a journey, but things seem to be settling down and I'm getting back to doing the things I like.

But enough about me, does this mean I'm back? Possibly, it's more about documenting my DIY adventures rather than having an online presence. 

Pachinko Restoration: Intro

So I purchased 2 pachinko machines years ago off craigslist. The first is a Mizho I paid $60 CDN for and 
Mizuho

the second is a Sankyo that cost me $80 CDN.

Sankyo
I got my father-in-law to build me display cases for both pachinko machines, which allows the machine to be beautifully displayed. A bonus feature of this wall mount display is that the Pachinko machines can be played on indefinitely, with lost balls collected at the bottom of the display (This was not my design, I found it somewhere and don't remember where. If this is your design and want credit contact me).  

I am going to start by restoring the Sankyo machine first, and the main issue I have with this display cabinet and these Pachinko machines is that I can't open the machines to service them. Normally you could reach around and lift the lock mechanism, but once inside the wall cabinet that isn't possible. I don't have the original keys, and obtaining a key is impossible apparently. I originally wanted to replace the lock, but these locks are integrated into the machine and removal would damage the Pachinko machine. So my solution is to remove the tabs that lock the machine closed, so I can swing the machine open to service. With the tabs removed I then run into the problem of how to keep the machine closed when in use. My thought is to install some cabinet door close magnets (Hoping they will be strong enough to keep the door closed). 
Here is the lock mechanism


This is the lock tabs.


That's it for this post, next post I will have hopefully obtained the parts needed to solve my Sankyo opening and closing issue.


Tuesday, January 17, 2023

EX475 Update

Its early into 2023, so why am I posting about 15 year old technology? Well its bittersweet, in that I am finally saying good-bye to my HP Mediasmart Servers. They have served (no pun intended) me well, but I have obtained some newer hardware, which I will write about in the future. So before completely powering down these servers for the last time, I want to discuss the final, non documented upgrade I did to them.


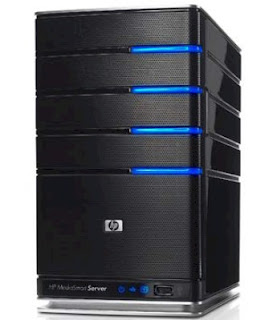
Just so as to bring everyone up to speed... In 2008 Hewlett Packard released the "HP Mediasmart Server" line of home computer servers. A collaboration with Microsoft and it's Windows Home Server software to make servers available for the home consumer market, a somewhat failed venture that I believe was years ahead of the market. Regardless of my beliefs, over the years I managed to acquire 3 HP Mediasmart EX475 units, 2 of which are still working, and 1 that I keep around for spare parts. In addition to these I also have a non functioning HP Mediasmart EX485 which I have never gotten around to fixing. Along the same theme I also have a now retired Acer H340.
The problems with these servers, besides the obsolete software and 15 year old hardware, is that the power supply in these units is non standard, and replacement units are hard to come by and expensive (not really worth the investment).
I have already documented all the hardware upgrades I've made to my HP Medismart Servers in previous posts (which can be found following these links. Part 1, Part 2, Part 3 ).
As I mentioned earlier, Microsoft developed the Windows Home Server operating system based off their Windows Server 2008 business platform to exist in the home consumer market. Windows Home Server was a great introduction for PC enthusiasts and general consumers to store large amounts of personal data, but it just didn't seem to catch on. In 2011 the second and final installment of Windows Home Server was released. By 2013 Windows Home Server was dead.


While there are many operating systems which will install on the HP Mediasmart Servers (Linux, FreeBSD), for my recent install I decided to try Windows 11 on my HP Mediasmart Servers.  Please be aware if you're going to try this please obtain a VGA adapter, as it makes the installation process so much easier and possible. Also take into account that my servers have been upgraded so your mileage may vary, for those interested in trying this out. One last item to mention, when upgrading the operating system, installing anything other than Microsoft Home Server will cause all notification lights to stop reporting, a function you can no longer use.
I came across a project called PhoenixLiteOS that has a Windows 11 distribution that was stripped down so as to enhance performance, something the EX475 was going to need help with. I was surprised to see that it did in fact install, and it was quite responsive, considering it was running a modern operating system on such old hardware.
In addition to the PhoenixLite Windows installation I also installed Stablebit Drivepool, which is hard drive pooling software with data duplication that I have been using for years. For me it works much better than Microsoft's Storage Spaces. 
The last crucial bit of software I installed was TightVNC, a program which allows you remotely log in and control you server. Seeing as the EX475 runs as a headless unit, this software is a must to setup and maintain your server.
I have been running this setup for a number of months now, and everything works as it should. For those with HP Mediasmart servers still in operation, this might be a way to keep them going for a few more years. 


Also for those wondering, I also attempted this software upgrade on the much more underpowered Acer H340, with success, however while possible...I honestly wouldn't recommend this as a daily driver. While similar in hardware to HP's mediasmart server, Acer's 2GB ram maximum cripples this machine, which becomes abundantly clear when running a more modern operating system.

If you enjoyed this little update, let me know, and I will document my more modern equipment.


Monday, February 26, 2018

2005 Yamaha BWS (#2): Strip Down & Rear Lighting


Nadia's scooter (pictured above), just doesn't have the pep it once had. It's a 2005 Yamaha Zuma (YM50, same as mine) with the stock 50cc engine still in it. While it's been a great learner scooter, the 50cc engine just isn't giving the same power it once was (Nadia's words, not mine). With those words in mind, I felt it was time to give this scooter a little power increase and slight beauty makeover. 

Since I've already detailed much of the transformations I'm planning on doing with this scooter on my scooter, I'll dispense with the extensive write up, and proceed straight to the pictures.

(minor cracks to the fairing, and scratches will be addressed)
(passenger foot rest damaged)
(not visible, but rack bolts sheered)
(Turn signals to be integrated with tail light, license plate area to be shaved down)


Disassembly


(Sheered screw holder on the inside of fairing) 
(used JB Plastic Weld to re-secure the fastener area, worked quite well)
  Rear Lights

(Marked out where the LEDS would mount)
(same as above picture, but other side)
(Hole drilled out)
(LED's mounted)
(Rear lights completed)


Monday, July 24, 2017

2005 Yamaha BWS: Update. Finished


Finally, my 2005 Yamaha BWS is running insured, and on the road!

I would have loved to document more of the engine overhaul, however this website wasn't co-operating during the rebuild, and I didn't document anything. 

Cosmetically you can see the difference from a stock 2005 BWS (Blue), to my mine. The rear fender has been hacked, front fender removed, wheels pasti-dipped, and all the fairings painted and polished to match original color, and the addition of front LED side markers.

Engine upgrades included a 70cc big block kit (Airsal), 17mm Arreche carburetor (upjetted), Doppler intake, Malossi reeds & cage, aftermarket air filter. Everything went together rather smoothly, with the exception of the Doppler intake which seemed to push the carburetor out of position. With the Doppler intake I could no longer use the stock air box as it would not line up properly. I had no choice but to replace the stock air box with an aftermarket air filter.

On the exhaust side the Doppler pipe I ordered, specifically for this build, didn't fit. I had to substitute a Leo Vince.

In the transmission I replaced the rollers with the Doppler ones that were packaged with the aftermarket pipe. I installed a Malossi delta clutch and Malossi torque spring.

While it's not my fastest build, it easily keeps up to city traffic, and is much smoother.

My take away from doing this build, is DO NOT BUY DOPPLER PARTS!!!!
Stick with brands like Stage6, Malossi, and Athena when possible.


Wednesday, May 10, 2017

2005 Yamaha BWS: Taillight & Turn Signals

Following up on the documenting of my front fairing mods, this entry brings you my modifications to the rear taillight and turn signal indicators. I was hoping to replicate something similar to the photo below, which sell at scootertuning.ca for $79.99 (CAD).