

Here's my new bike, that I've been building over the winter months. Truth be told, I finished it back in April, but I've been having a few odd issues, which I'll be discussing in a future post. Anyways for those of you interested in this bike build then keep reading...
I got the frame, wheels, cranks, pedals, chain-ring, headset, and single speed derailer used, from a guy off Pinkbike.com. It cost me $160 (CDN), which was a pretty good deal, and a great place to start.


The Frame

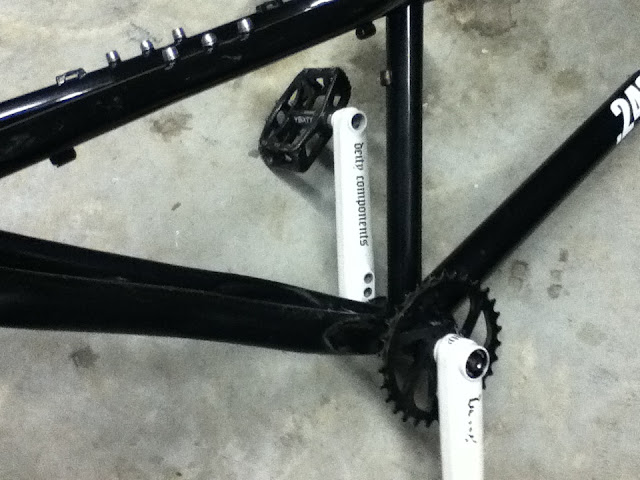
The Cranks, Sproket, Pedals, Bottom Bracket


The Single Speed Derailer


Wheels


Forks


Brakes


Seat and Post


The Build So Far...


Ebay Stuff


Almost Finished


Completed
By: Mass
The frame is a cro-moly rigid, made by Canadian company .243Racing. The FSA pig headset was already attached to the frame, and seemed in reasonable shape, so I decided to leave it on and just lube the bearings.


The Cranks, Sproket, Pedals, Bottom Bracket
The cranks are made by Diety, and feel super strong. I'm not sure what botton bracket bearings are installed but I'm assuming they're the ones that came with the cranks. Once again I left them in, and simply re-greased them. I did pull off the cranks and 32tooth sprocket, just to give them a cleaning. Not sure who makes the sprocket, but it was showing very little wear, so I stuck with it. The pedals are VSixty platform pedals, that look good, but seem a bit stiff. I've never ridden this brand of pedal before, so I'm not sure if they're damaged or just naturally stiff. When turning the pedals in my hand, they feel as if they're a bent, not noticeable enough to warrant changing just yet, but it might be a future decision.


The Single Speed Derailer
Before I start describing this next phase of the bike build, I want to explain to everyone, what a piece of crap this next part is. It came with the bike, and I really wanted to go single speed, so I decided to use it. The guy who I bought all these parts from, said he was getting rid of this bike because he couldn't ever get the single speed to work correctly, and I can see why. The problem seems to be, that most people running single speed, are using small sprockets and small cogs (at the rear wheel). Doing so, gives the chain only a few teeth to grip on to, so usually the chain falls off. To prevent this a single sped derailer is used, however most single speed derailers are made to push the chain down, what we modern small sprocket/cog riders need is a single speed that pushes up. The Axiom derailer that came with my frame, had a spring in it that could be only used to push the chain down. I dismantled and reassembled this thing about 50 times, and finally ended up removing the spring completely and using some cable ties to secure the derailer in the pushing up fashion.


Wheels
Both the front and real wheel came with Sun Rims X25 rims, Shimano M475 hubs, unknown spokes, unknown inner tubes, disc brake rotors and Kenda downhill tires. Now these wheels were pretty beat up, and the front hub was missing all its bearings, axle and skewer. So before I could use these for riding I needed to fix the front hub. Originally when I started out on this project, to keep costs down, I was going to cannibalize my Kona Dawg Deluxe cross country mountain bike for parts. Seeing how this bike build was coming together, I made a decision not to cannibalize my Kona, but instead try to keep this bike build to a reasonable budget.


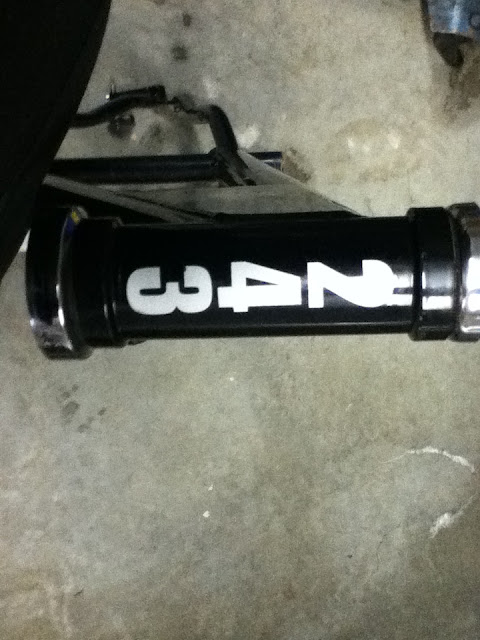
Forks
Since this was going to be used for street/skate-park riding, I wanted to go full rigid. Having spent so many years riding BMX/Flatland, I was never very comfortable on suspension bikes, and I'm getting much too old to ride BMX's anymore. I wasn't able to find any used rigid forks, so I ended up buying some Kona Project 2 rigid chro-moly forks, which cost me $110 (CDN, w/Tax) at a local bike shop.


Handle Bars and Stem
I was able to find some pretty cool looking .243Racing bars and stem from a local rider, once again using Pinkbike.com. I paid $20 (CDN) for the bars and $25 (CDN) for the stem, and they match my frame perfectly.


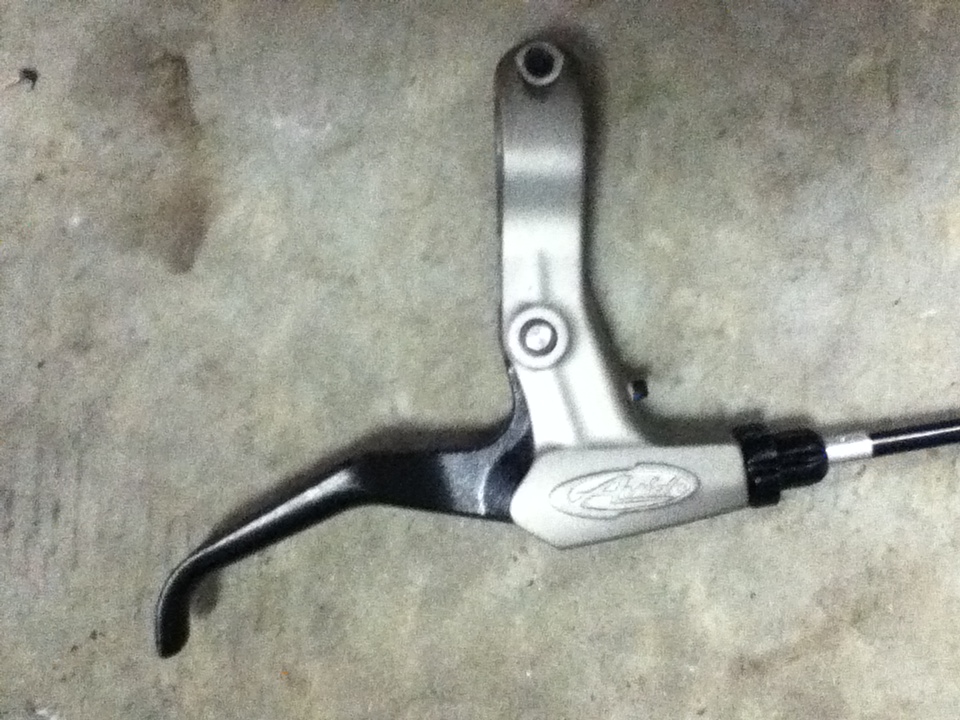
Brakes
For braking I was originally going to scavenge the hydraulic brakes from my Kona, but was fortunate to have a good friend of mine donate a set of mechanical disc brakes to my cause. My buddy Kelvin, had these Shimano mech discs, with avid levers sitting around his garage collecting dust. I'm so lucky to have such great friends.


Seat and Post
A local BMX store (3ride.com) was clearing out their line of railed seats, since BMX's today all seem to use the new pivotal system. Now I was seriously debating going to the new pivotal system for this bike build, but I already had an Odyssey Intact railed seat post sitting around, and for the $21.00 (CDN w/Tax) I decided to go with this Shadow Conspiracy seat. (As a side note, this seat is super comfortable)


The Build So Far...
You can see in the next picture that I have a seat post clamp installed. I neglected to mention that it came already installed on the frame, and that I had temporarily removed it while taking pictures. I never seemed to actually get a picture of it on it's own, however you might be able to make out that it's a Shadow Conspiracy clamp.


Ebay Stuff
By this time I think the bike's about 80% built, and I'm waiting for the mail-person to arrive with the rest of the parts I ordered from various Ebay sources. Now I would like nothing more than to support the local economy, but some of the parts I'm finding online are 1/3 of the price found locally.
Finally parts arrive...


Almost Finished
Here are some pictures of the assembly so far.


Mini Update
The Odyssey Intact post I had seemed to work fine, but it was actually too small. .243Racing uses a non-standard seat post size of 26.8, so I ended up purchasing an Axiom seat post from a local bike shop $18 (CDN).
Completed
Ok, so I was so excited about finishing this bike, that I forgot to take pictures of the Jag Wire brake cables that the mail-person brought the next day (my bad). Finally got the brake cables routed, and the bike is ready for fine tuning. The bike cost me about $350 (CDN), which I thought was quite reasonable.
Let me know what you think...

